Table of Contents
ToggleA concrete patio doesn’t have to look cold or industrial. With the right approach, you can build a stylish outdoor living area that rivals more expensive materials, and do it yourself without maxing out your credit card. Concrete is inherently budget-friendly because it’s durable, requires minimal ongoing maintenance, and offers endless design flexibility. Whether you’re pouring fresh concrete or refurbishing an existing slab, this guide walks you through cost-saving strategies, professional-looking finishing techniques, and creative design ideas that prove a tight budget doesn’t mean sacrificing curb appeal or functionality.
Key Takeaways
- Concrete patio ideas on a budget cost $4–8 per square foot for materials, and DIY installation can save an additional $500–1,000+ in contractor labor.
- Stamped concrete DIY rental stamps cost just $10–30 versus $8–15 per square foot hired out, saving $3,000–5,000 on a typical 20×20 patio.
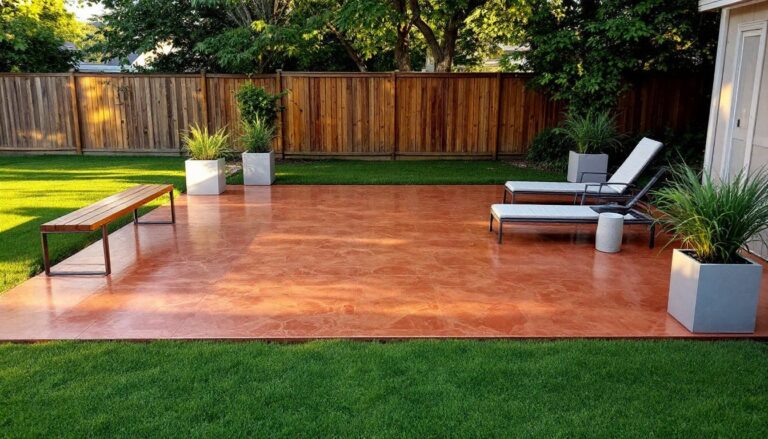
- Staining and sealing a concrete patio costs $200–500 in materials and transforms a plain slab into a permanent, professional-looking finish without chipping or peeling.
- Proper subgrade preparation—including gravel base and compacted soil—prevents costly damage like frost heave and reduces concrete needed, saving money upfront.
- Modern concrete patio designs using geometric scoring, broom-finishing, or polished concrete achieve high-end aesthetics for under $200, proving creativity works better than expensive materials when budget is tight.
- Check local building codes before starting your patio project; most residential patios under 200 square feet don’t require permits, but verification prevents costly problems during resale.
Why Concrete Is the Smart Choice for Budget Patios
Concrete wins on price compared to flagstone, brick pavers, or composite decking, the material itself costs $4–8 per square foot, and if you pour it yourself, you skip contractor labor, which can double or triple the expense. It’s also virtually indestructible. Once cured, it won’t warp, rot, or splinter like wood, and it won’t shift like gravel. That durability means fewer repairs and replacements over time, making the upfront savings compound.
Beyond cost, concrete is forgiving for first-timers. You have hours of working time before it sets, which means mistakes can be smoothed out. And finishes range from plain broom-swept (cheapest and only takes a few hours) to stamped, stained, or sealed looks that rival expensive materials. The real secret to a polished concrete patio is finishing technique, not expensive ingredients. Even a basic slab becomes an asset when finished with intention.
Essential Cost-Saving Strategies Before You Start
Planning cuts costs faster than any budget trick. Before ordering concrete, measure your patio area, mark out the footprint with string, and remove any debris, vegetation, or old concrete. A clean, level subgrade saves concrete (and money) because you won’t need extra depth to compensate for uneven ground.
Order the right amount of concrete. Calculate square footage (length × width), then divide by 9 for yards. A 10×12 patio needs 13.3 cubic yards. Order slightly more (add 10–15%) to account for spillage and settling, but don’t guess wildly, overordering wastes money. Ready-mix trucks have minimums (typically 1 cubic yard), so if your project is under 10 cubic yards, bag concrete may actually save money even though labor-intensive mixing. For projects larger than 10 cubic yards, truck delivery is almost always cheaper.
Prepare subgrade yourself. Rent a tamper ($25–40 a day) and compact the base. Add 2–4 inches of gravel as a bed, this is non-negotiable for drainage and prevents frost heave in cold climates. Use form boards (2×4s) to frame the patio edge: you can reuse them on other projects or sell them secondhand. Doing this prep work yourself saves $500–1,000 in labor.
Skip the acrylic sealer on year one. A basic concrete seal costs $50–150, extends the patio’s life by 5–10 years, and protects against staining. It’s worth doing eventually, but if cash is tight, pour the patio and seal it next year. Your patio won’t suffer, and you’ll spread costs over time. When ready to seal, apply it yourself with a roller or sprayer, another $30 task versus $200+ in labor.
DIY Concrete Finishing Techniques That Look Professional
Stamped Concrete Effects on a Shoestring
Stamped concrete (concrete embedded with texture to mimic brick, stone, or tile) typically runs $8–15 per square foot when hired out. You can DIY it for the cost of rental stamps ($10–30 per tool) plus concrete. The trick is timing: stamps must go in when concrete is firm enough to hold an impression but still plastic enough to accept the pattern. This window is usually 4–8 hours after pouring, depending on weather and concrete mix.
Here’s the process: After screeding your concrete level, let it begin to set. Test readiness by pressing your thumb into the surface, it should leave a mark but not be tacky or soupy. Lightly mist stamps with water or apply a release agent (vegetable oil or commercial stamping liquid) so they don’t stick. Place stamps and tap them gently with a mallet, working in a pattern across the slab. Overlap edges slightly for a natural look. Mistakes? Smooth out the impression and try again before the concrete hardens. Once cured, the stamped pattern rivals $12/sq ft hired work. This approach saves $3,000–5,000 on a typical 20×20 patio.
Staining and Sealing for Maximum Impact
Concrete stain transforms a gray slab into warmth and character. Acid stains ($25–40 per gallon) react chemically with concrete to create earthy tones, terracottas, greens, grays. Acrylic stains ($15–30 per gallon) sit on top and offer bolder colors. Both cover roughly 250–400 square feet per gallon. Unlike paint, stain won’t chip or peel: it’s permanent.
Application is straightforward: Clean the concrete thoroughly (pressure wash, dry completely), apply stain with a pump sprayer or mop, and let it react for 24–48 hours. Rinse if using acid stain. Seal with a polyurethane or acrylic sealer to lock in color and protect against UV fading. A two-tone stripe or border effect is cheap insurance against a boring slab, use painter’s tape to mask off sections before staining. Stained and sealed concrete costs $200–500 in materials for a 400-sq-ft patio, versus $2,000+ for pavers or flagstone. According to resources on practical concrete patio enhancements, staining is one of the most cost-effective upgrades for an existing slab.
Creative Concrete Design Ideas for Every Style
Minimalist and Modern Looks
Modern design thrives on simplicity and clean lines, concrete is the ideal material. A plain broom-finish slab with steel edging creates an industrial aesthetic. Add geometric scoring (shallow lines cut into the concrete post-pour) in a grid or chevron pattern to break visual monotony without added cost. These lines serve a dual purpose: they guide the eye and create expansion joints that prevent cracking.
Pour a concrete patio in a light gray (natural Portland cement) and surround it with dark mulch or low-growing plants. This contrast is effortless and contemporary. For a splash of color on the cheap, paint sections of the patio with concrete paint, this isn’t permanent (it will eventually wear), but it costs under $100 and lets you test bold colors before committing to stain. Mix functional minimalism with bedroom decorating ideas on a budget principles: less is more, and thoughtful curation beats clutter.
Polished concrete is another modern option if you’re willing to rent equipment. Wet grind the cured slab with a floor grinder (rental: $40–60/day) to expose aggregate and create a smooth, glossy finish. This removes surface flaws and gives the patio a high-end look for under $200 in tool rental and supplies. The result rivals concrete floors in luxury homes, not the price tag.
Designers and homeowners shopping for southern home and outdoor design inspiration often incorporate natural stone accents paired with concrete. A concrete patio with a narrow flagstone or river-rock border feels intentional and costs less than an all-stone surface. These mixing-materials approaches are where budget constraints actually spark creativity, limitations force smarter design choices.
Before you finalize your design, consult renovation planning guides and cost resources to understand regional price differences and contractor input on permitting requirements. Most residential patios under 200 square feet don’t require permits, but local codes vary. If your patio abuts a structure or involves drainage modifications, check with your building department first. Many DIYers skip this step and regret it during resale or disputes. A 15-minute call beats a $2,000 problem later.